[print_link]
* Clicking on an imagine will allow you to enlarge it.
Ok I am sick of looking at a blank wall in our hallway, need something to hang above our antique Hall table. Finally decided on a Chippendale style mirror but in a slightly larger scale.
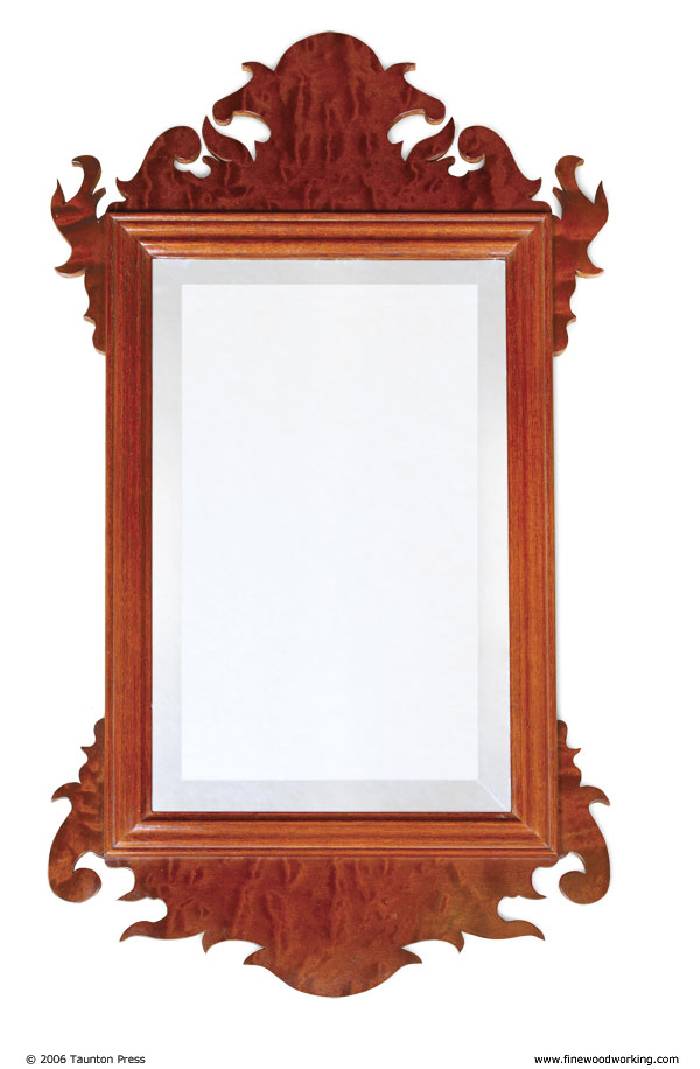
The sample picture on the left is of a mirror available as a plan from fine woodworking : Fine Woodworking Chippendale Mirror Plan
The Mirror I am making is based on the plan available in the book called “Making Traditional Mirrors and Picture Frames” ISBN 1-56523-223-2.
If you’d like further reading on Thomas Chippendale, checkout http://en.wikipedia.org/wiki/Thomas_Chippendale
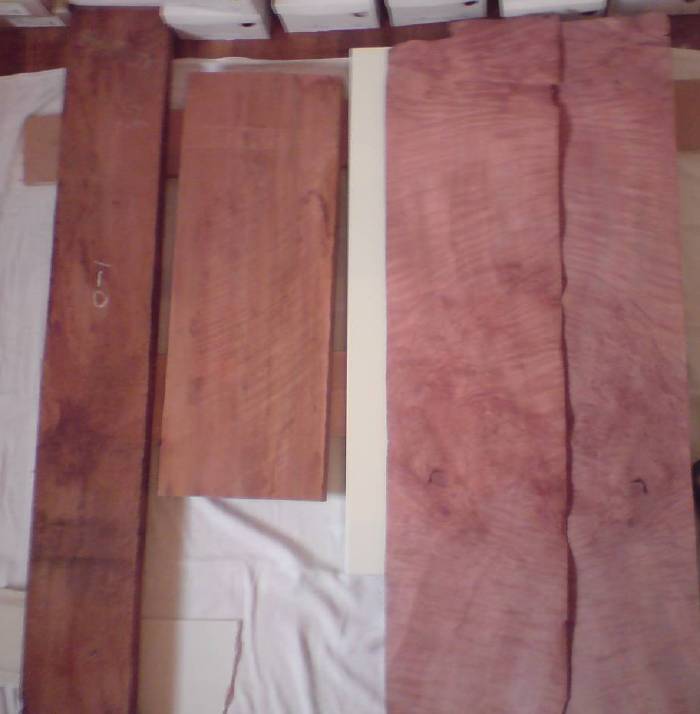
The timber is Tasmanian Myrtle both in solid wood and veneer forms.
Materials were sourced from Bob at www.tasmaniantimbers.com.au/ The veneer has some awesome figure and I found the myrtle very easy to work with.
At this stage I think I’ll grain fill with a darker filler to tone down the redness and make the grain pop, this will also make it a better match with the existing hall table.

Templates were photocopied and enlarged to the needed size. Then glued onto 3mm mdf and cut out on a scrollsaw. This will come in handy if i stuff up a piece or if i ever want to make another mirror.
Timber was flattened and the wider board was resawn to about 5mm to serve as the substrate for the venner and to be used in the scroll work.

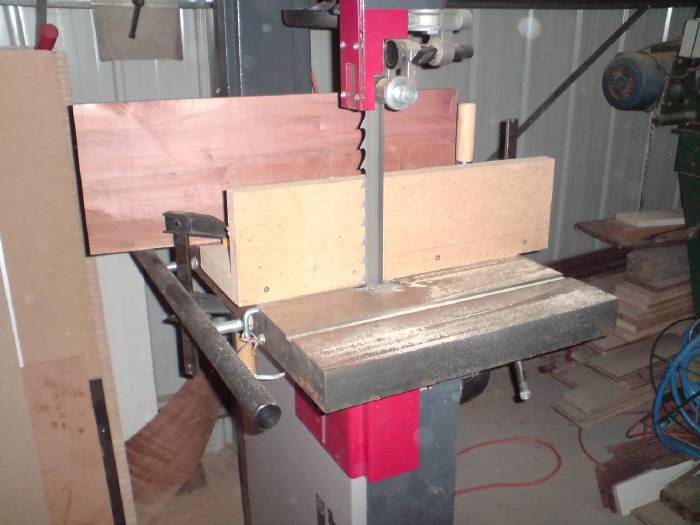
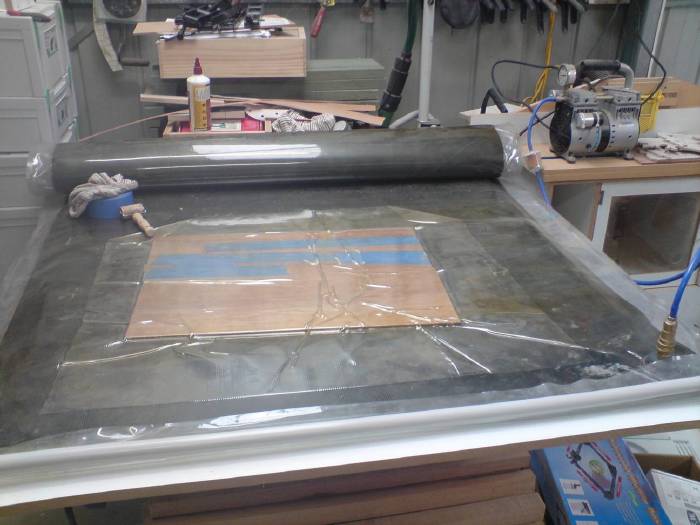
Resawn timber was edge glued together and then the figured veneer was vacuum pressed to the myrtle to make up the scroll work sections. The backs of the boards were also veneered using cheaper veneer to help keep the panel in equilibrium and avoid bowing.


![]()
Finally got to cut the scroll work for the mirror.
I haven’t done much in the way of scrollsaw cutting before, this is actually my first real piece. While I am not entirely happy with my cuts, overall the piece looks good.
I still need to do some sanding to even out my curves and to bring the sides to a closer match, but its 95% done.
Next i’ll mill up the frame stock and route the moulding, more pics to come…
![]()
This mirror has been dragging on for quite a while, I think I have been a little daunted by the frame, I really hate miters!
Anyway, I finally plucked up the courage to have a go and I am very happy with the way things turned out.
![]()
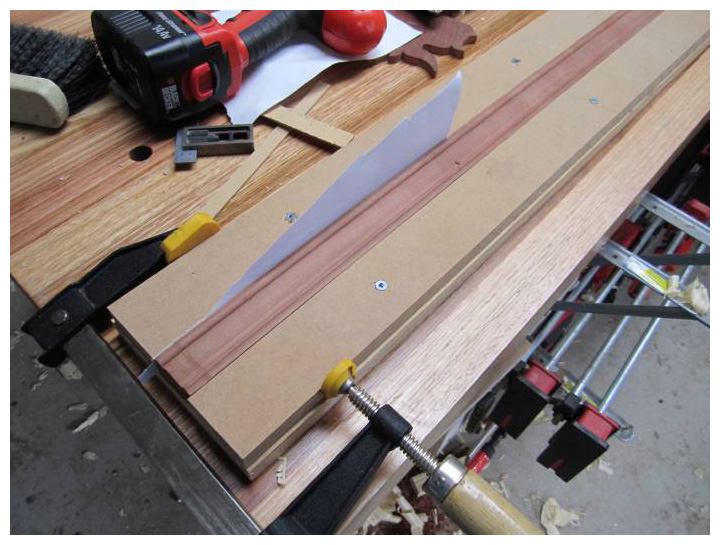
After mulling over the best way to cut the I decided to build a small frame to hold the moulding flat, in place and with support front and rear to minimise tear-out.
Theres nothing fancy with the jig, its just some scrap pine and mdf screwed together to support the moulding. I also glued in a small strip of pine to help support the moulding.
This basic jig turnout out to be a great help, as I also used the jig when cutting the floating tenons using a domino later on.
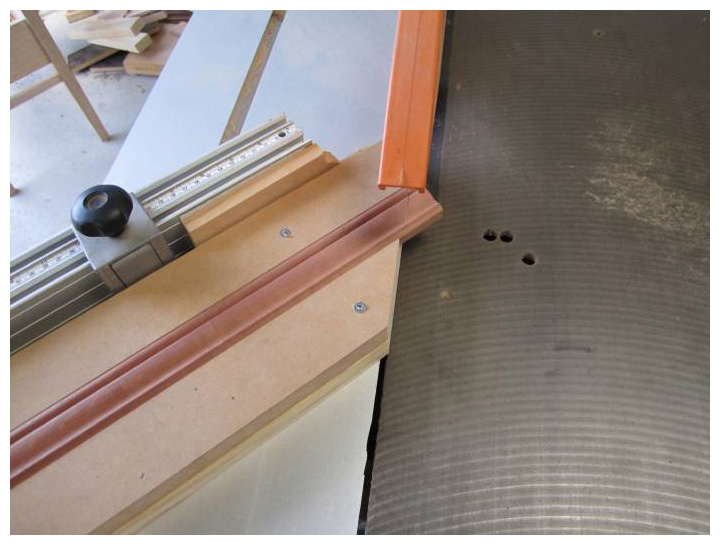
With the jig securely clamped to slider on my tablesaw I dialed in the 45 degrees and cut all four sides.
Some cuts meant I had to flip the moulding to cut it, but the jig held it without a problem.
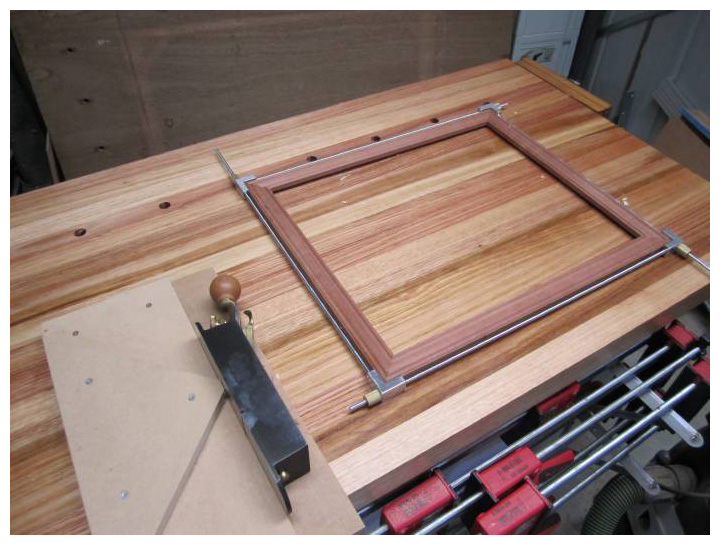
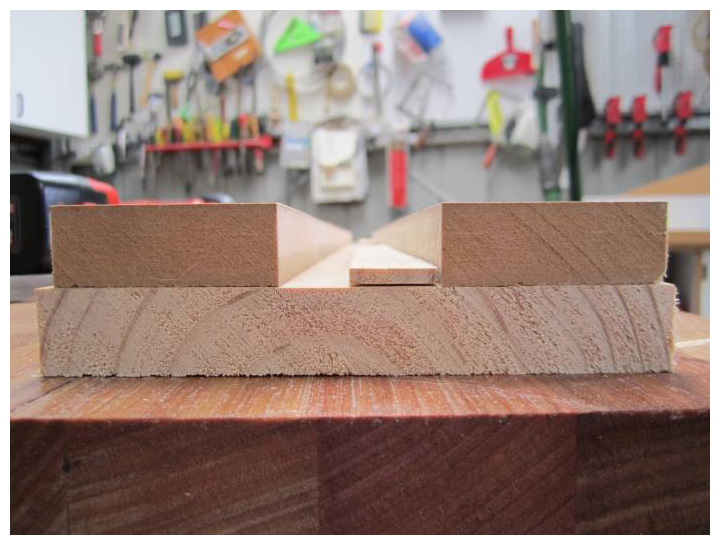
Once the mitres were cut I dry fitted them together using a picture frame clamp.
Next step was to fine tune the mitres using a shooting board. This was the first time I have ever taken this step, and it made a huge difference for me. The additional tweaking available makes mitering much easier.

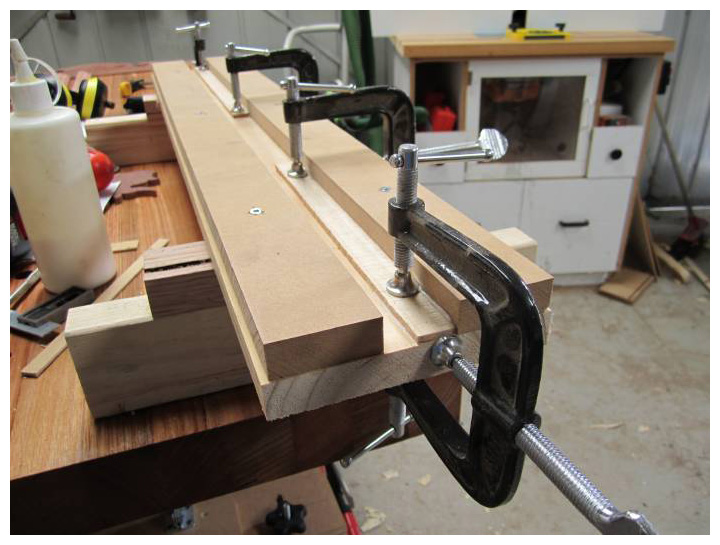
Here I am re-using the holding jig for the joinery.
I temporarily added a hold down clamp and penciled in some registration marks to keep the domino joints centered a couple of minutes later I am all set for glue up. With the frame being so small I went for the 4mm dominos.
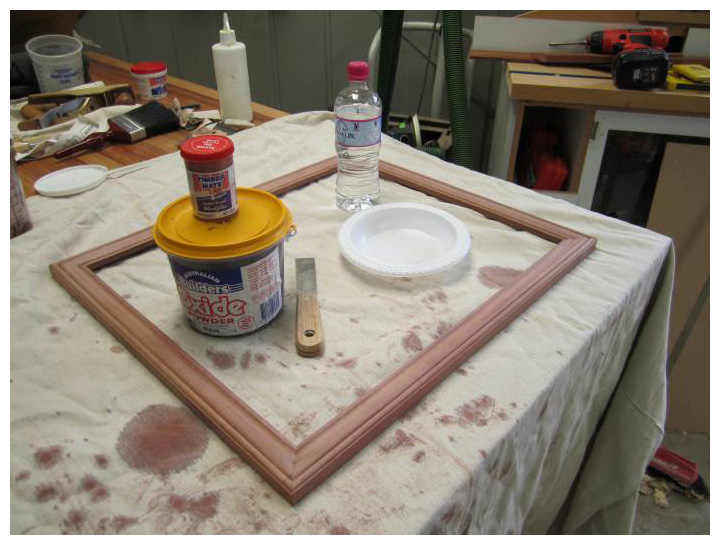
Once the glue had dried I grained filled the frame and sanded off the excess once dry. This took a lot longer than I had expected, next time i think i’ll use scrapers to make most of the job done.
Here is a quick picture after the initial sanding.
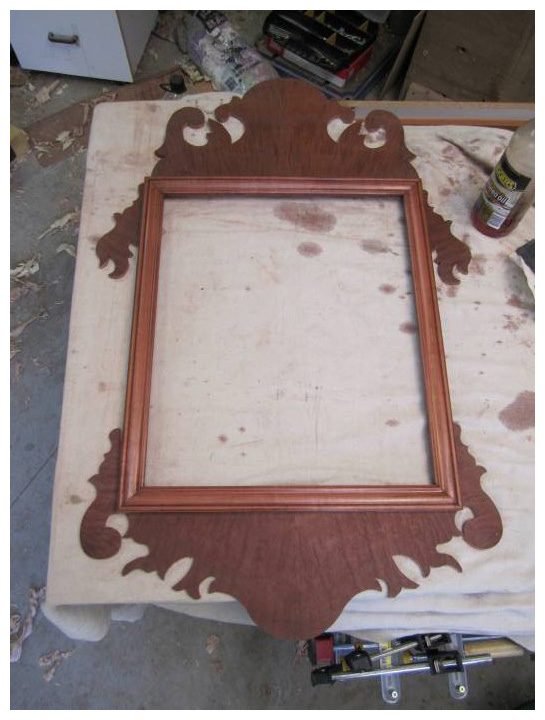
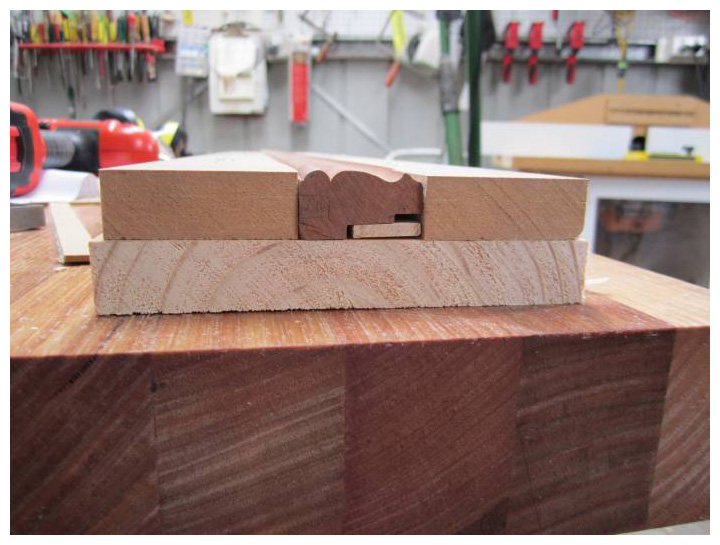
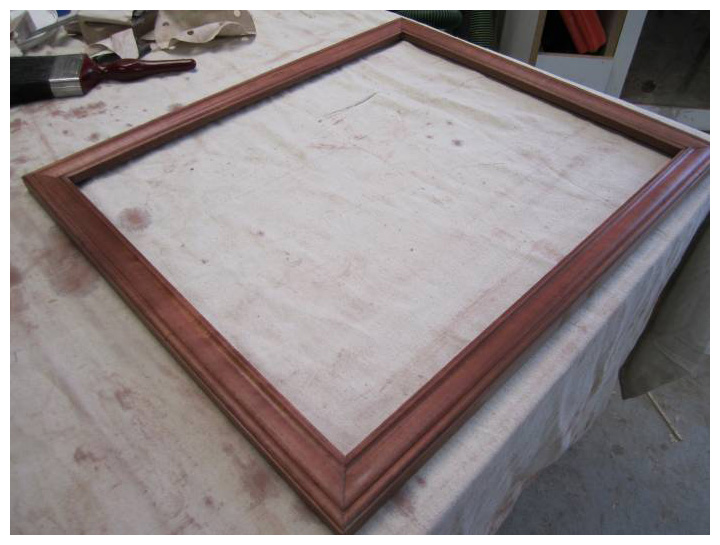
Finally a dry fit, the original fretwork seems quite a bit darker, they have been sitting around the workshop for a while, so I am not sure if they have just darkened over time or if the veneer itself is just darker.
I’ll add a touch of color to my lacquer topcoat to help create a even tone throughout the whole mirror, although I dont mind some contrast.
Next I’ll route out the dadoes for the fretwork, glue them in and apply a finish……
![]()
Ah the weekend is here, finally some real shed time 🙂
I routed the dadoes and squared up the edges with a small mortice chisel, everything is ready to receive the scroll work.
I have to say that Tasmanian Myrtle is beautiful stuff to work with, its up there as one of my favorites.

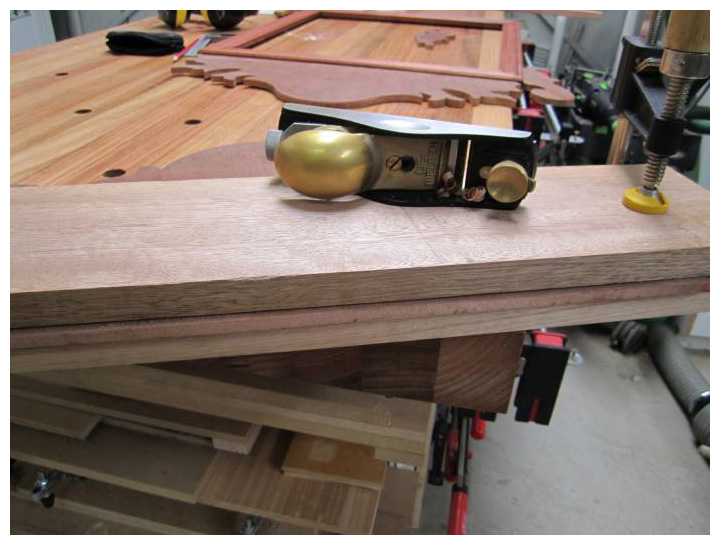
Understandably the panels are over sized, so I planed all the panels down to fit.
Holding the work in between a couple of clamped cauls worked a lot better than simply holding everything down by hand. No risk of snapping anything in half either (been there done that 🙁 )
I love this part of the process, the swishing of a hand plane, watching those curly shavings peeling off your work everything slowly coming together. All those separate little pieces slowly merging into one piece of furniture.
![]()
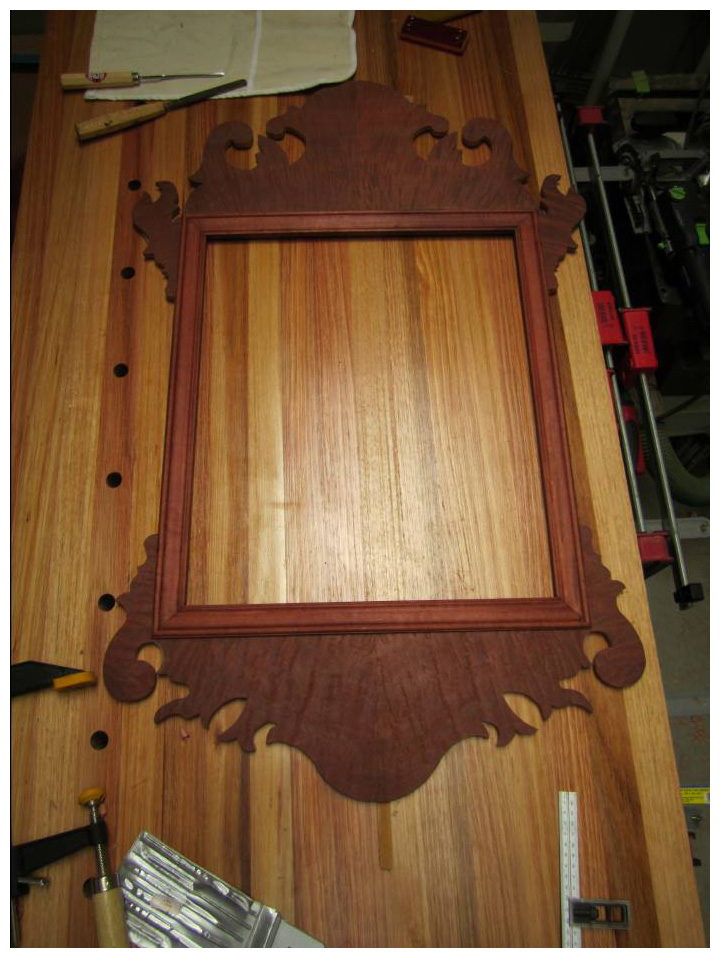
Here we go, the final dry fit. This time with the ears on the right way up!
Cant wait too see the veneers with some finish on them to pop that grain.
Unfortunately with the wet weather the way it is at the moment, I think I’ll put off the finishing til the weather picks up. I really want to take my time and will probably spend a full day spraying a number of coats and rubbing it back
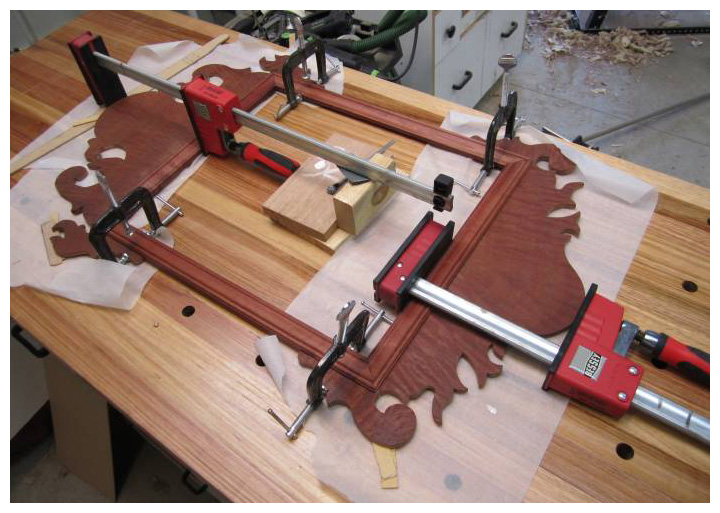
Final Glue-up, looks trickier than it was.
A couple of little “C” clamps to hold the sides in place and two Besseys’ to fit the top and bottom and were all done.
Not 100% sure yet but I might put some glue blocks on the back to further strengthen the scroll work, only issue is that there isnt much room back there.
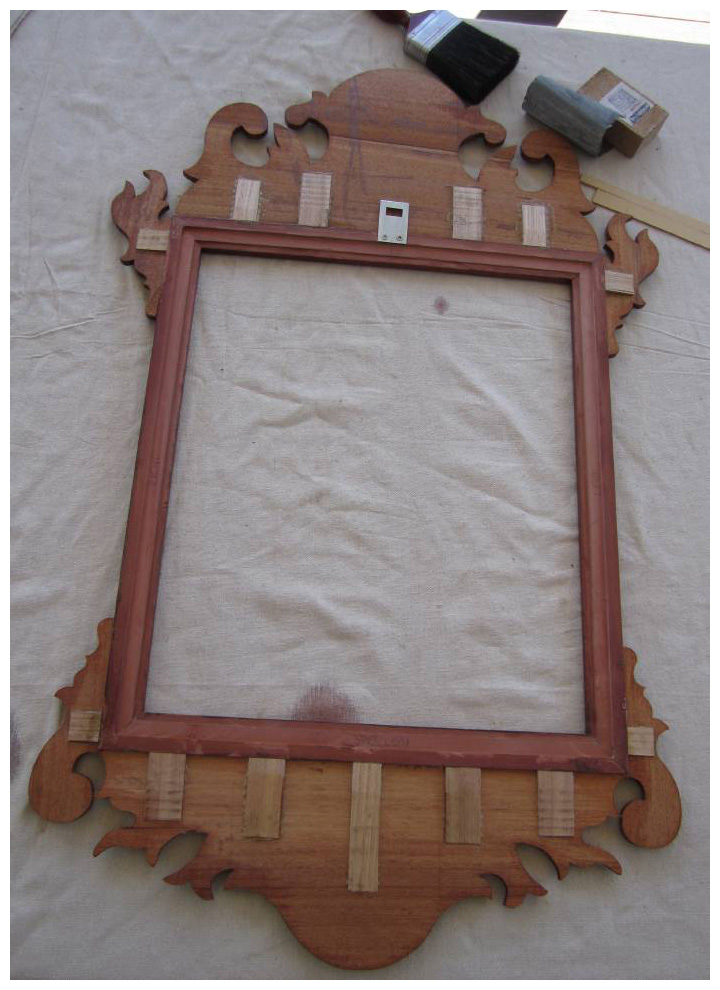
Finally after paying my dues in the Garden, I got to spend some time in the workshop.
With the front all glued up and ready for finish, I got to work on the back putting in some blocks for additional support and making a mounting bracket from some old brackets I had lying around.
Not 100% sure about the grain direction on those support blocks, but they are only about 2mm thick so I don’t think it matters that much anyway.
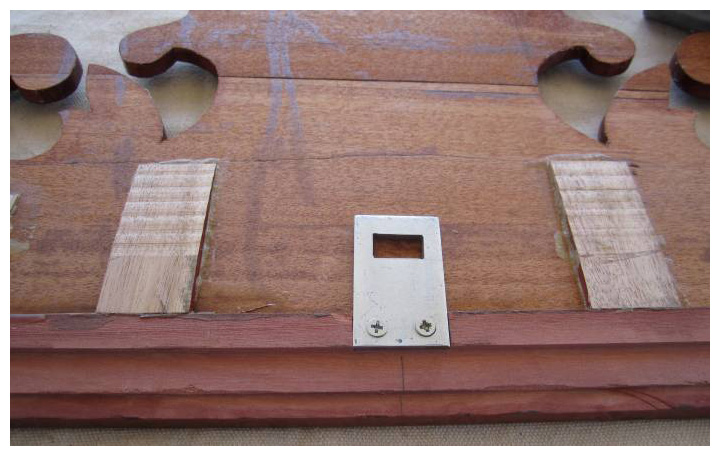
Bracket was drilled and counter sunk, the hook hole was cut with a scrollsaw. The hook hole is oversized to allow a little sideways moment to help straighten out the frame when its hung on a wall. The whole bracket was morticed into the frame to allow it to sit closer to the wall.
Now time for a finish, in this case pre-catalysed lacquer my finishing schedule was:
4-6 Coats of 100% gloss thinned at about 4:1
Rub back the finish with 600 grit sandpaper
4-6 Coats of 75% gloss thinned about 2:1
I spraying using a HVLP gun with a 1.2mm tip.
Initially I tried to apply the gloss coats at about 10:1 but the finishing wasn’t leveling out so I increased the thinners to resolve this.
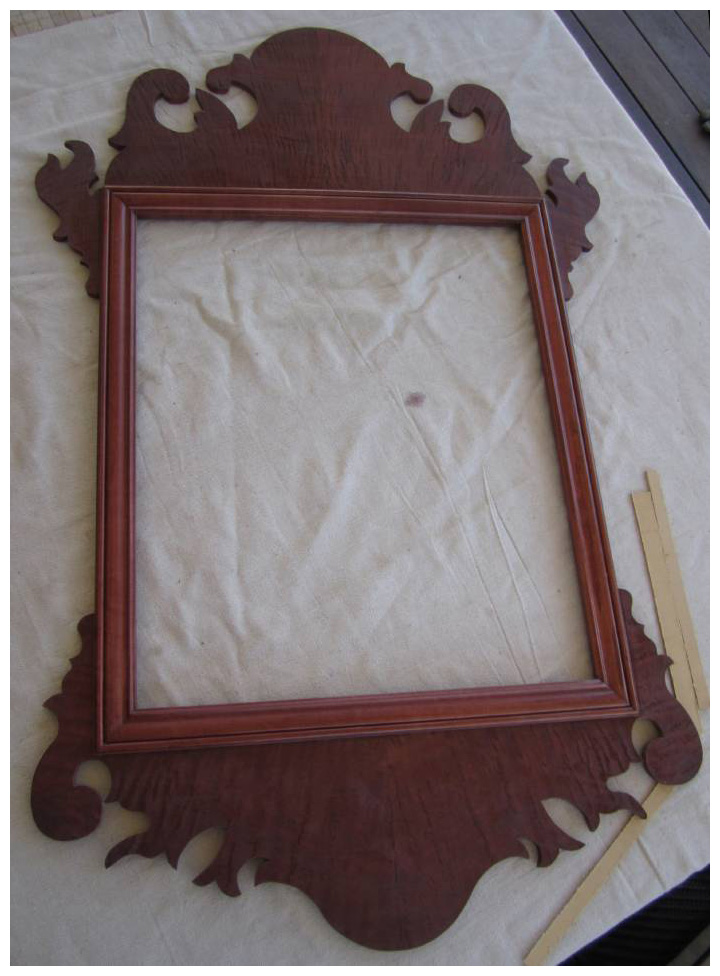
In these two pictures you can see the results after the rubbing back.
I used a high gloss because its clearer ie no dulling agents added. This allows me to build a clear finish quickly and build some depth to the finish. The gloss level of the final coats allow you to adjust the shine later on.
Here you can see the results after rubbing back the finish, the low spots appear glossy. The photo makes them look pretty significant but in reality I doubt they’d be much more than 1/4 the thickness of a piece of paper.
If I were after a glass like finish I would repeat the gloss coats and rubbing back until the gloss area’s disappeared. Personally I like a little texture, it is wood after all, so I stopped my gloss coats at this point. I also find that as the finish continues to dry of the next week or 2 this will flatten out even more.
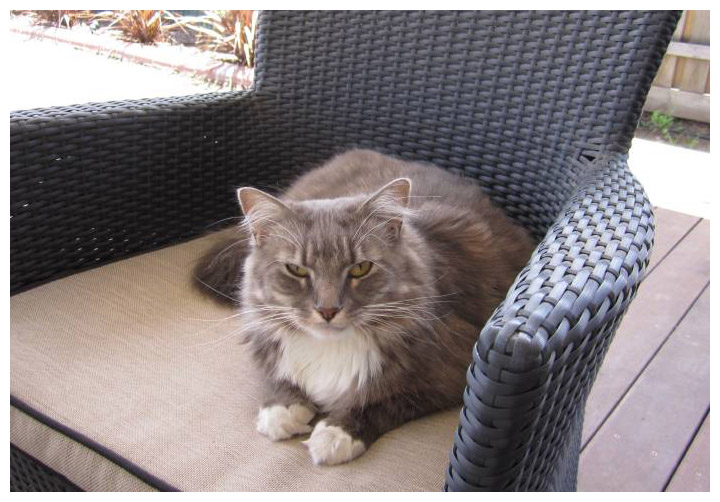
Here is the quality assurance officer, not looking to impressed!
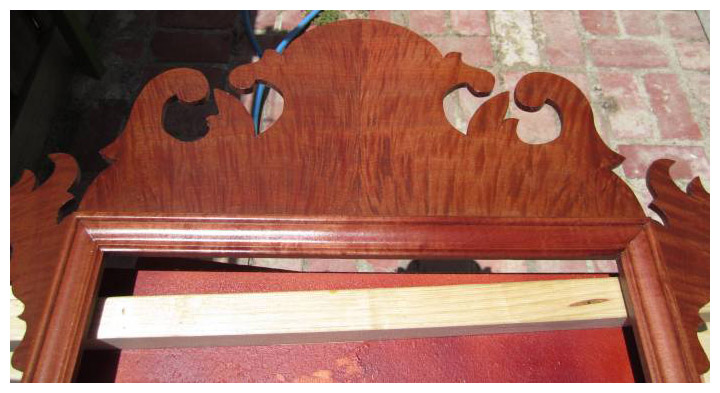
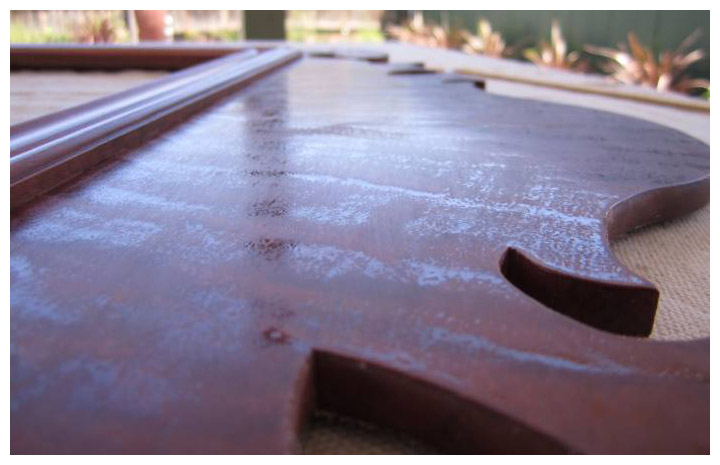
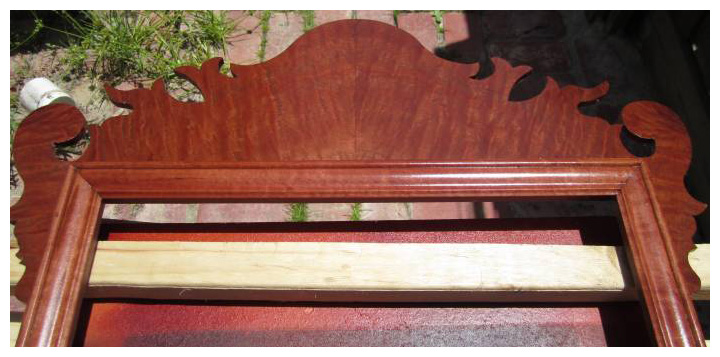
Here is a quick picture showing the top of the frame, its gives you a good idea of the grain in the veneer. These were taken in full sun with the wet finish so not ideal but you get the idea.
Bottom of the picture frame.
I’ll post up a finished picture soon, beveled glass has been ordered and is due in a week or two.
|
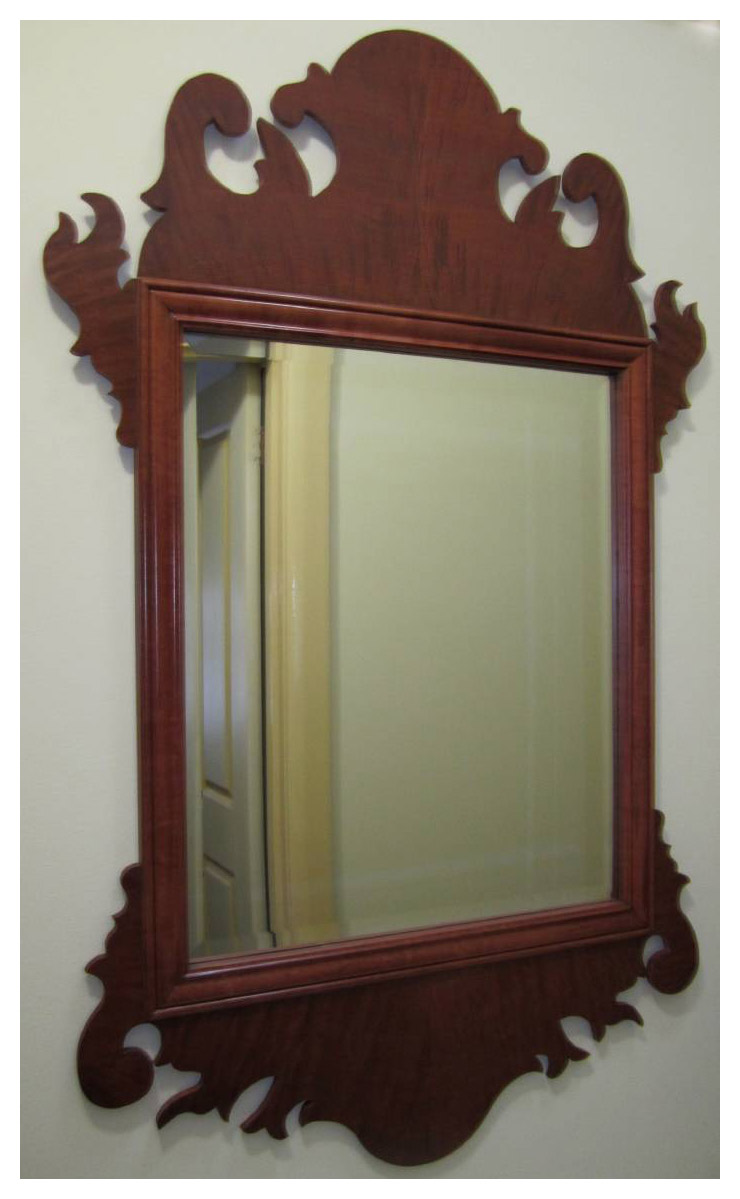
The beveled mirror was ready for pickup this week, so I finally got to finish this mirror. Finishing it off was a simple job just sit the mirror in the rabbets, and screw in the backing . I am very happy with the finished product, also surprised at the amount of work that goes into a relatively small piece. |
Pingback: Veneering the Chippendale Mirror
A beautiful mirror! Congrats. I was poking around, looking for more information before I begin one. I wondered how you got the Tasmanian Myrtle? Do you live in Tasmania? I see the name of the lumberyard, but from the states (near Canada), I think the shipping would be a problem.