[print_link]
I have been toying up with the idea of replacing an old chair we have in our bedroom with a piano stool. The extra width and the little storage compartment will be perfect for us.
My Mother in-law is also after something similar so if i can make it in time, I’ll try to make one as a Christmas gift as well.
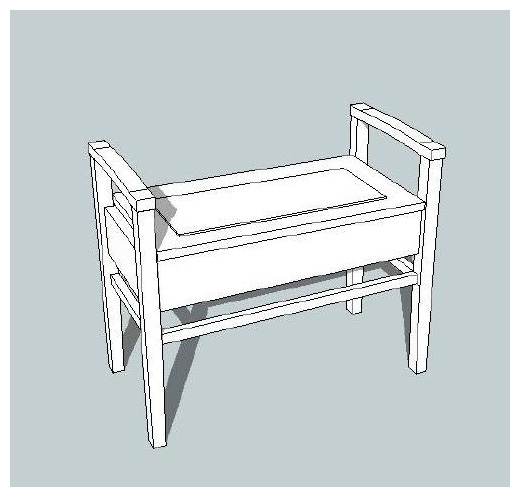
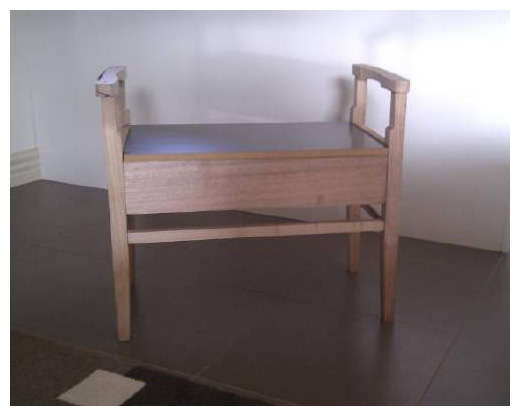
I couldn’t find any suitable plans, so i went off and drew up a basic plan using sketch-up, then over the weekend I made a rough mock-up.
Didn’t get as much done as I had hoped but the temperature was pushing 36 Celsius in the workshop so I only worked in 45 minute bursts throughout the weekend.
Overall I am pretty happy with the look of the piece. I think the waist is a little too thick, the legs need more refining, and I will also add another 50mm to the width.
Otherwise the piece seems pretty good, and functional. I think I will taper the legs more to give the piece a more feminine look. I’ll try to squeeze in another prototype in during the week and start on the real work next week.
For these stools I am going to be using Melunak, for the first time. I have heard good things about this timber, but have never used it before.
The accounts I have read, describe it as being similar to blackwood in appearance but at a lower density.
![]()
Now on to something more practical, some piano stools. I am making 2 stools each slightly different , one without an armrest and a fabric top, the other with arm rests and a solid top with a fabric insert.
Note: You can see a full thread on this build under the projects tab.
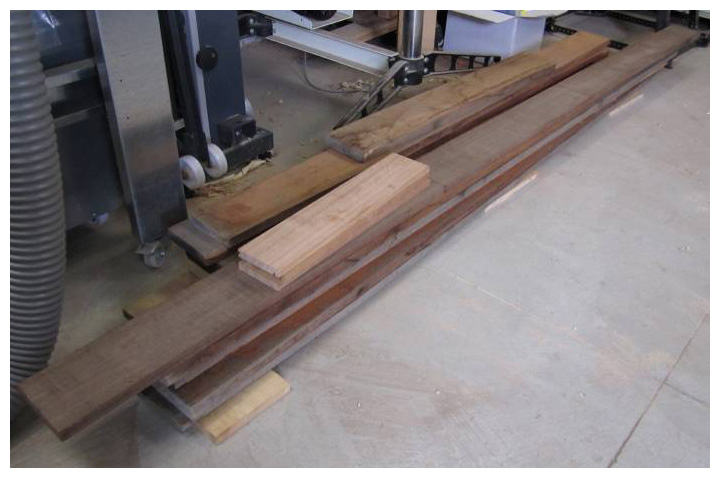
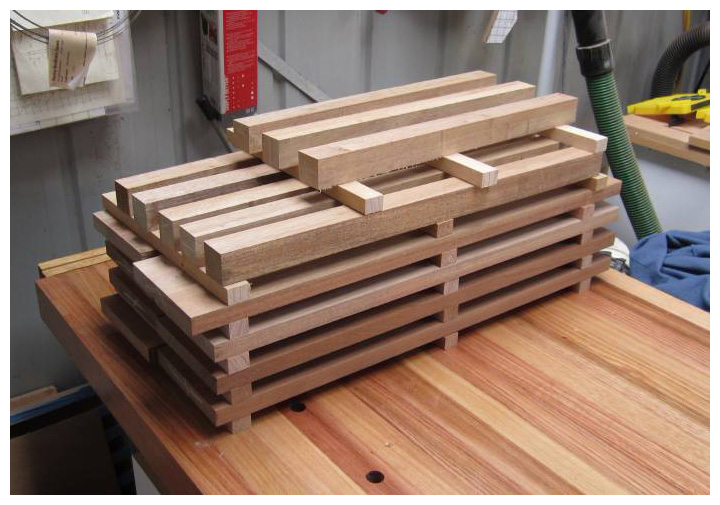
A nice pile of rough sawn Melunak for AF Timbers. There is more than enough here for the two stools.
I am hoping to use the left over to start on a wall hung cabinet for handtools in a future project.
I picked a couple of similarly colored boards and rough cut them to length and cleaned them up.
There is quite a variance in color between boards, depending on how the finished piece looks I’ll apply some stain to even things out when finishing the pieces.
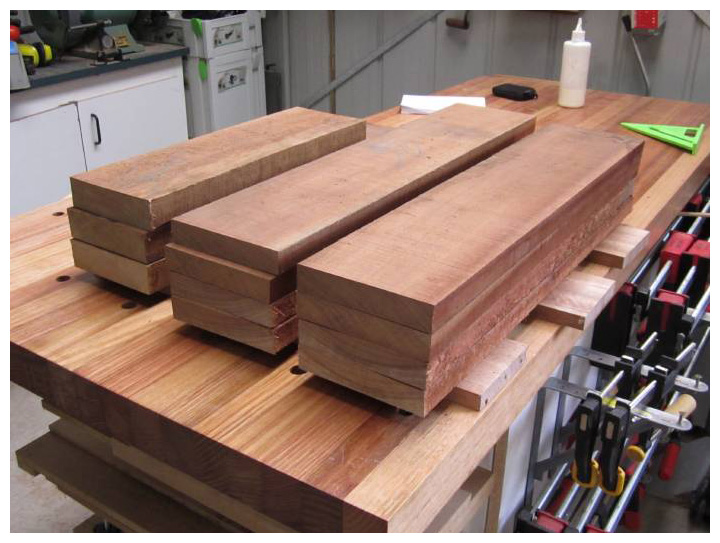
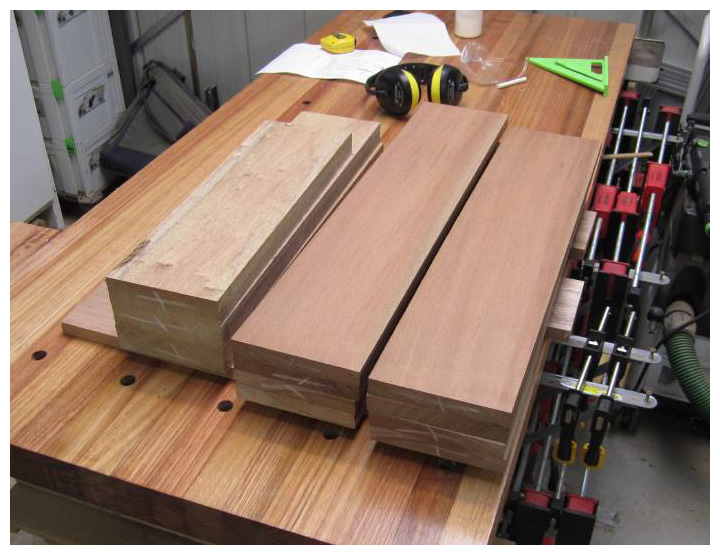
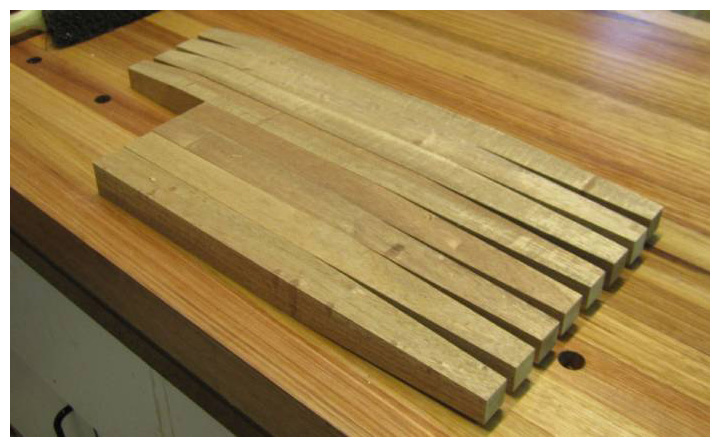
After letting them sit for a few days I trimmed the boards to final dimensions and cut out the x8 leg blanks on the tablesaw.
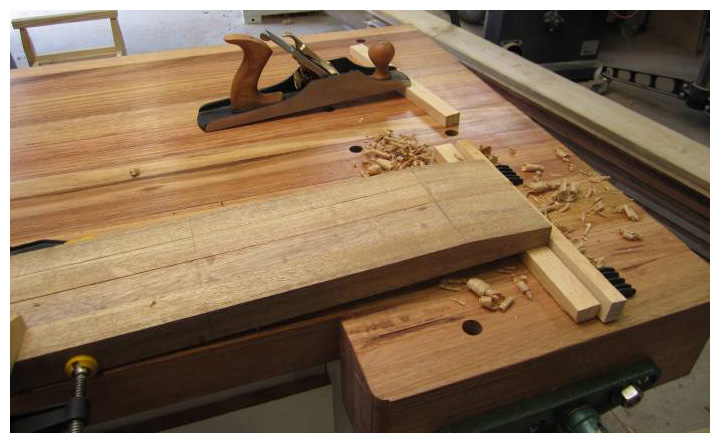
Giving all the boards a quick once over with the handplane.
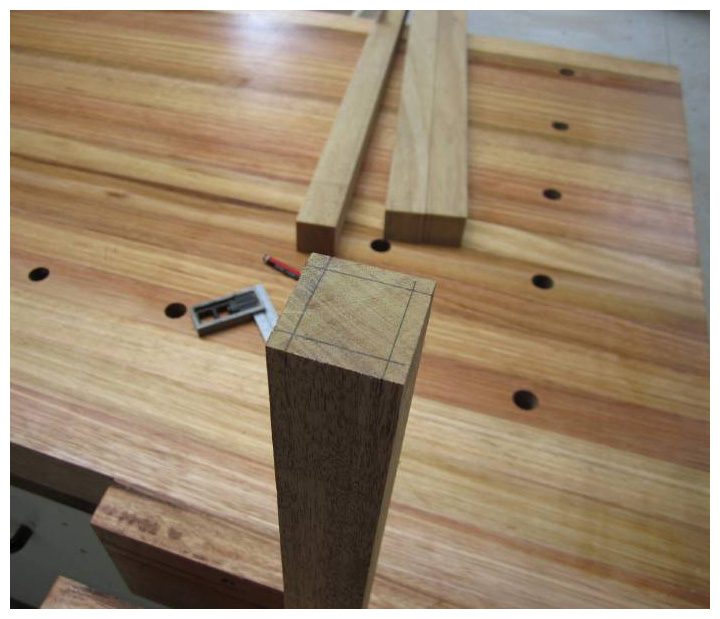
All the leg tapers were marked on the legs for easy reference, technically if your cutting the boards on a taper jig you dont need all the marks but they come in handy when finishing with a handplane or keeping an eye out for mistakes.
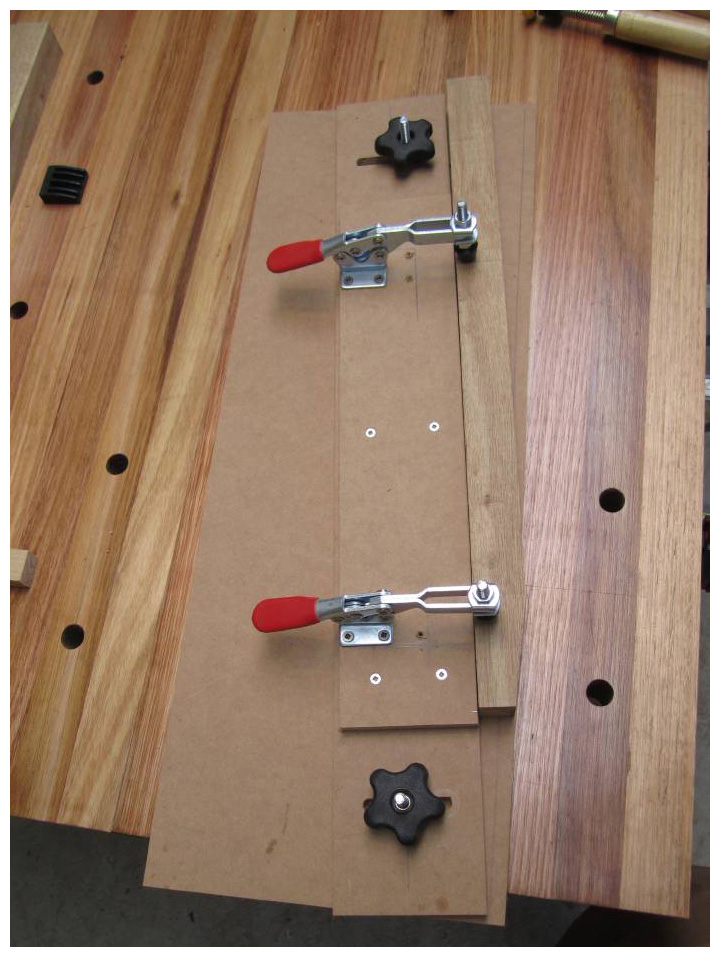
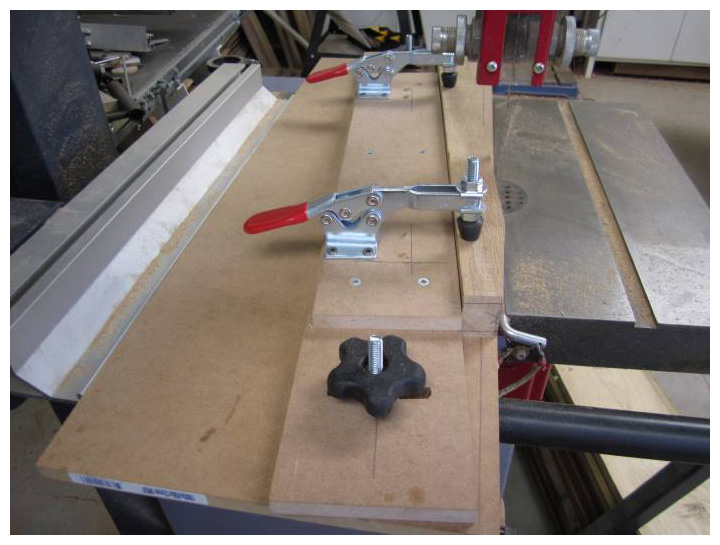
Basic taper jig I whipped up using some scrap 12mm MDF and a few jig fittings.
I bought 10 toggle clamps on eBay a while back and I just re-use them on jigs when needed, turned out very handy and they only take a minute to screw in anywhere they are needed.
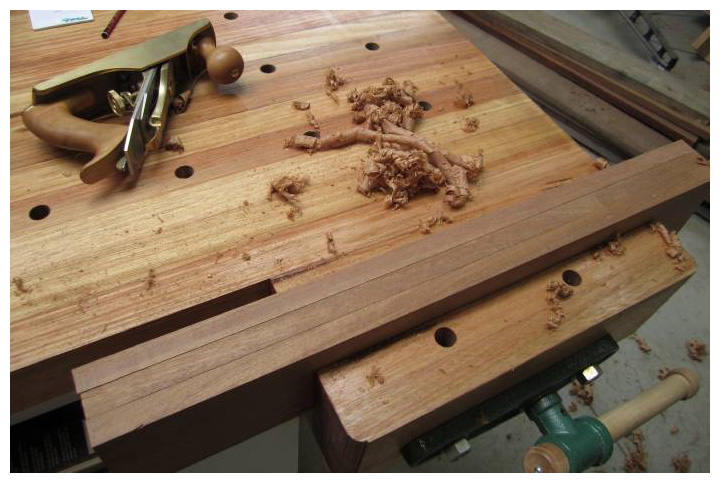
Tapers were cleaned up with a handplane and legs milled to final dimensions. The legs developed a nice shine after handplaning. I think I’ll either round over the edges or chamfer them to soften those corners, still unsure what to do just yet. I’ll wait till I do a dry fit before making a decision.
Joints being cut ready for glue up using a domino.
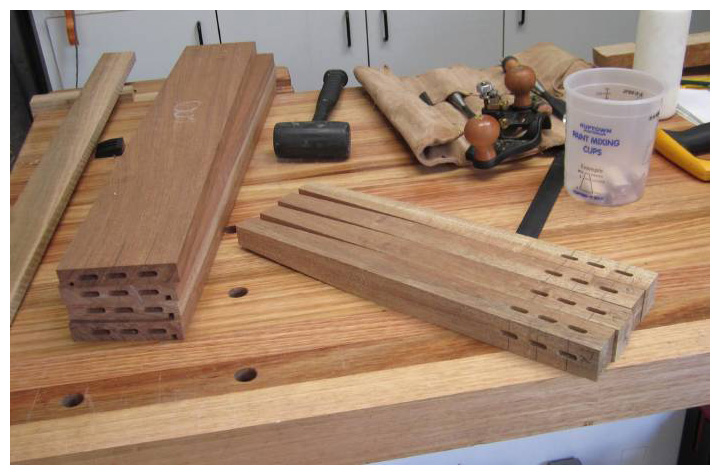
I used x3 6mm domino’s per joint, I trimmed them down from 40mm to 35mm so the mortises wont meet up in the legs.
Back to the pianos stools again this weekend 🙂

|
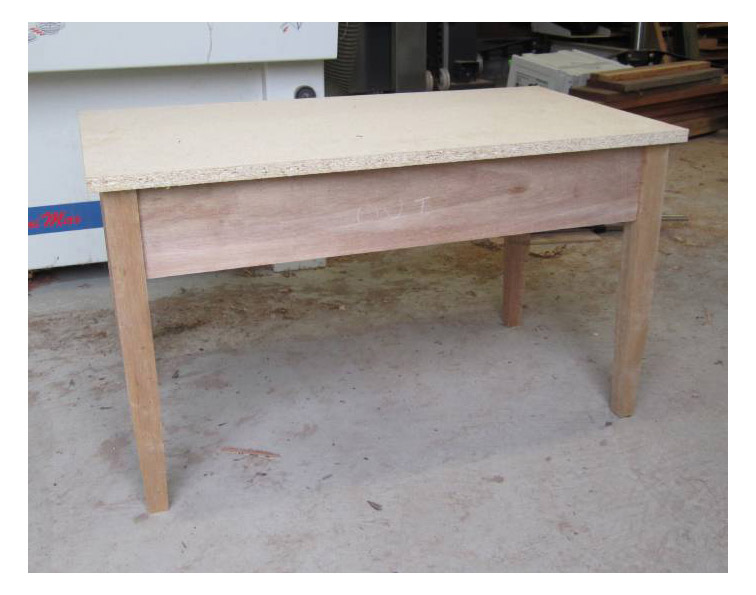
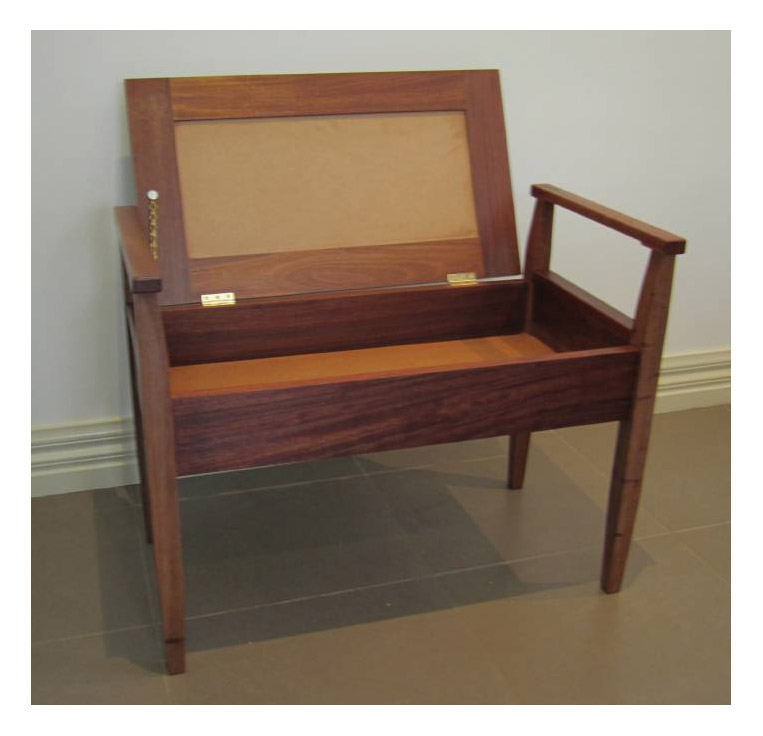
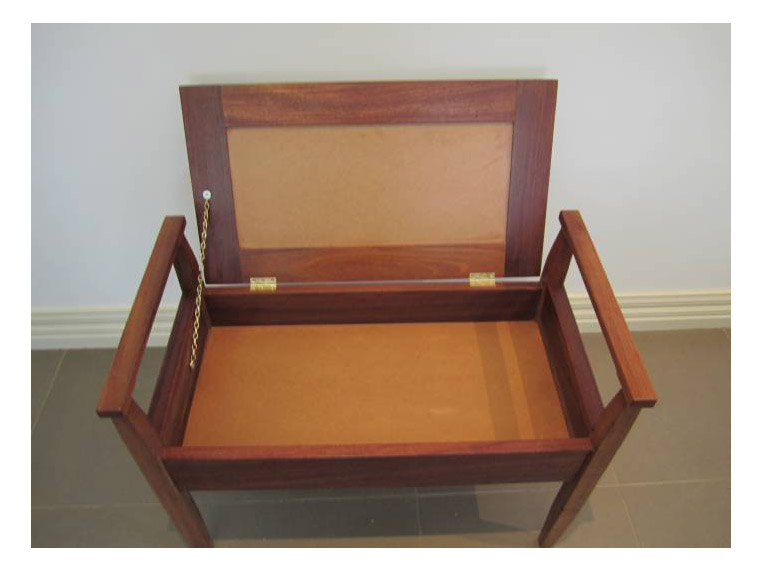
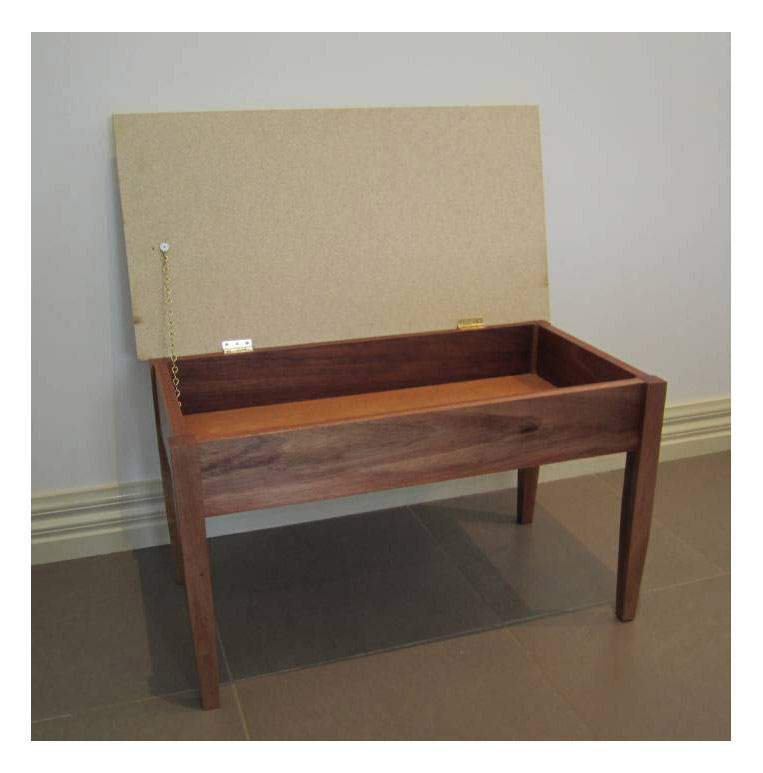
The Second stool has an inset padded seat. I cut dadoes for some 6mm MDF and dominoed the frame together using 6mm x 40mm Dominoes. Not 100% sure that there is enough strength in that slot to support a person, I might end up putting some bracing under the lid for some added safety. |
|
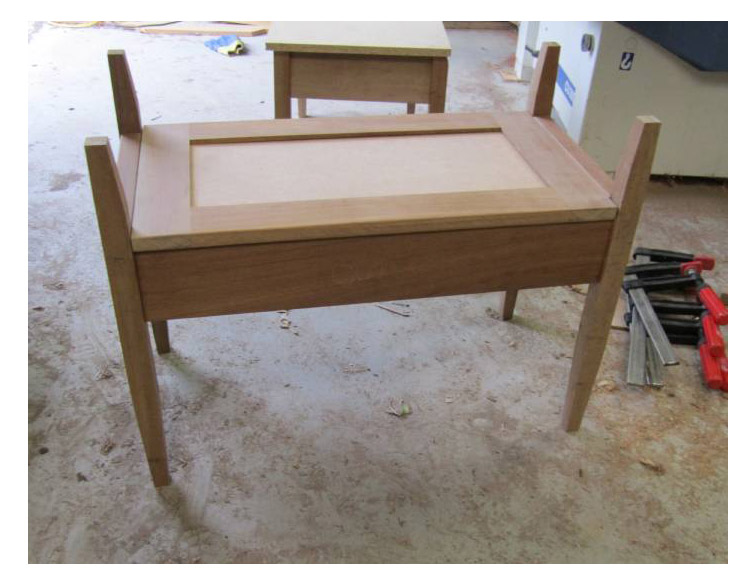
Here are a couple of pictures of the stools, pretty much finished. The second stool is still in need of some arm rests and they need a final sanding, and they are ready for a finish. I’ll probably start the finishing process with a coat of linseed oil to darken the timber a shade. One Stool will be left unstained getting a couple of coats of lacquer. The stool with the inset seat will be darkend to match the existing furniture in the room. |
|
The Stools are finally finished. 🙂 Finishing consisted of a coat of linseed oil followed about about 6 sprayed coats of pre-cat lacquer (75% gloss). I added a little walnut stain to the initial coats and only applied those coats to the lighter pieces (legs). I am happy the way they turned out, especially considering I had no plans to base them on. |
|
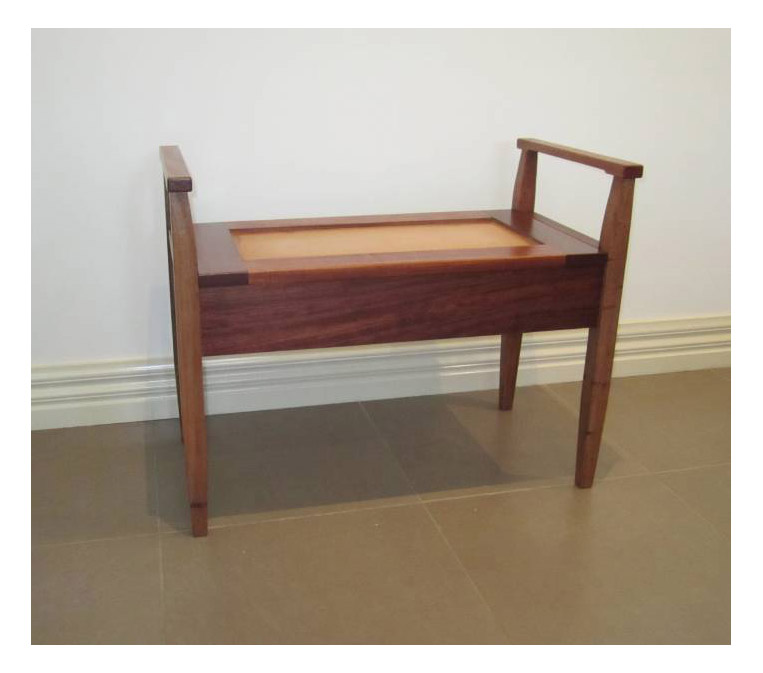
Piano Stool with insert padded seat. Still might add some bracing to the lid to support the center section of the lid. Really like the way this turned out. This ones going into our bedroom to provide some much needed storage. |

|
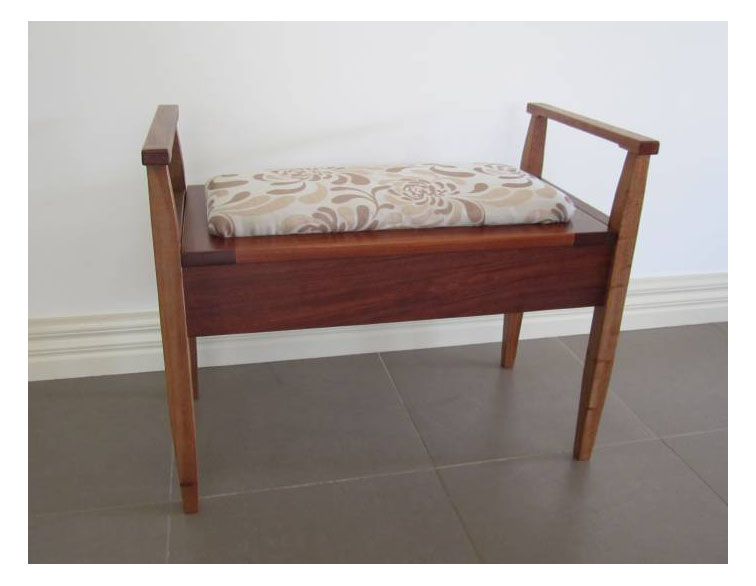
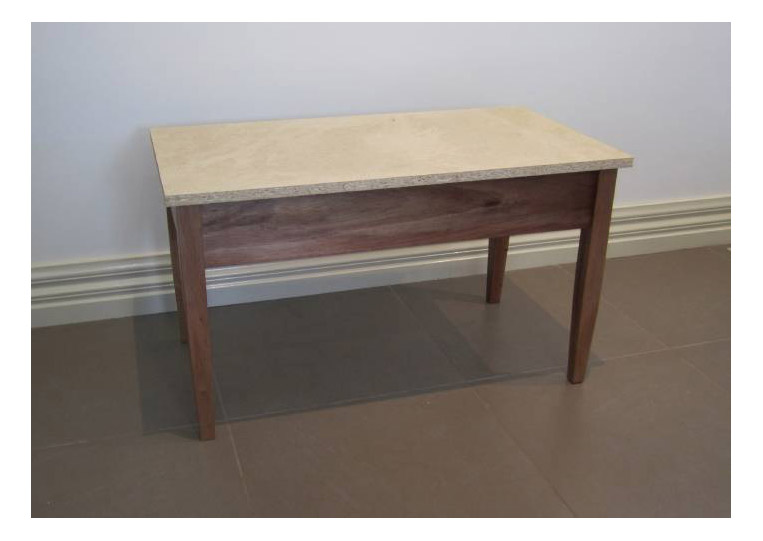
Piano Stool with full padded seat. This stool is a touch bigger, but honestly until the upholstery is completed it doesn’t look like much at all. Hopefully my better half will tackle this soon so we can put them into use and out of the garage (actually the kitchen lol). |
|
Finally got around to finishing the upholstery, thought I’d throw up a quick pic….
|